Mostrando entradas con la etiqueta Tutorial / Tutorial. Mostrar todas las entradas

jueves, 26 de diciembre de 2013

Remodelación de "Bristol House": Fachada (1ª Parte) / Remodel "Bristol House": Facade (1st part)

¡Hola a todos!

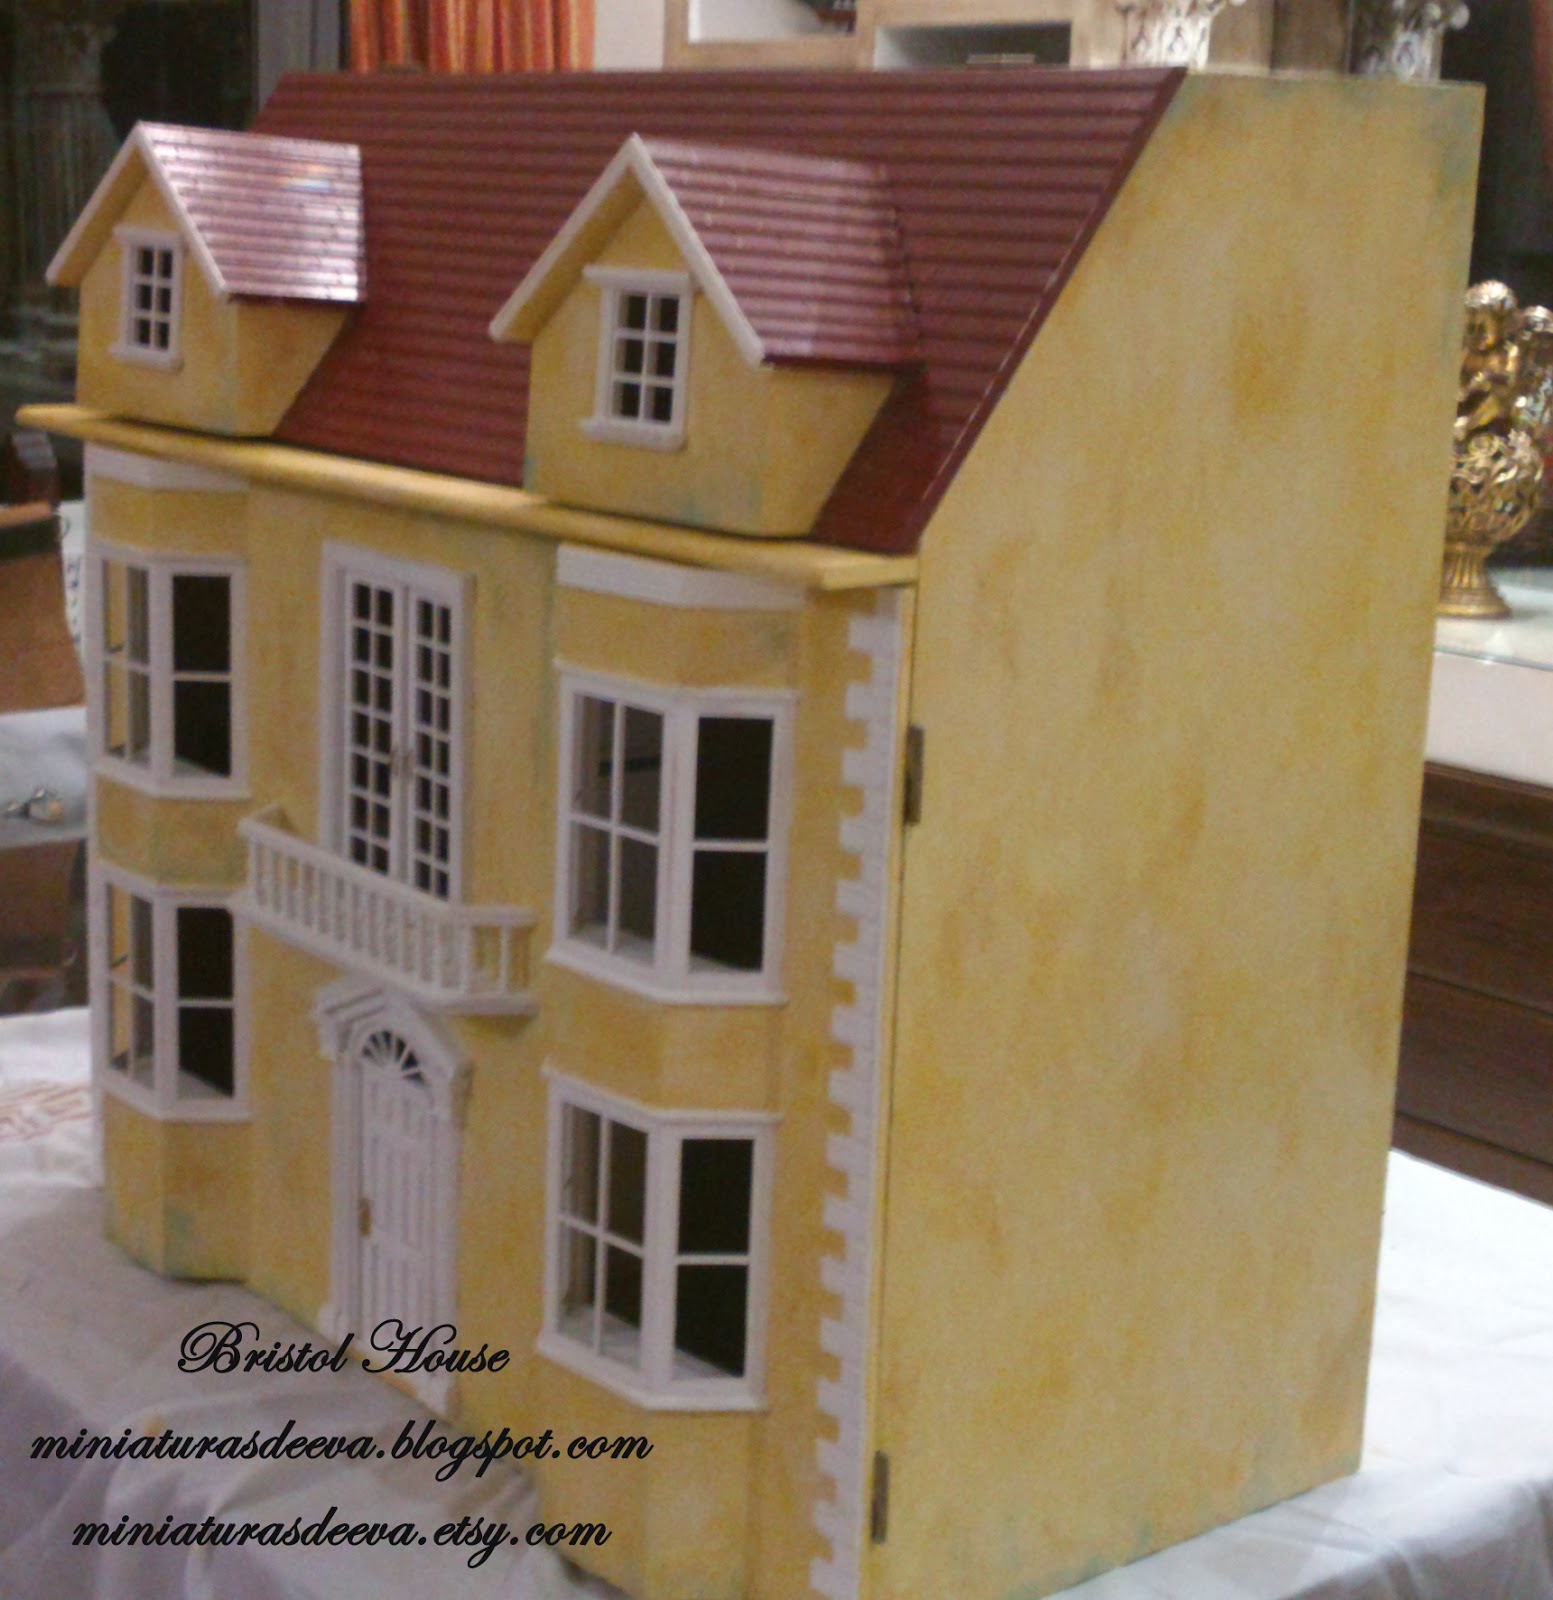
Espero que hayáis pasado una feliz Nochebuena y Navidad. Hoy quiero enseñaros el proceso de remodelación de la casita, a la que he llamado, "Bristol House".

(He aquí la casita inicial, tal cual venía en el Kit)

1- En primer lugar, quise que su apariencia no fuera tan perfecta, que tuviera rugosidades, imperfecciones en la pared. Y para ello apliqué una masilla: plaste. Esta masilla viene en polvo, se diluye en agua según lo espesa que la queráis. No lijé la superficie, ni apliqué imprimación, ni nada de nada. Directamente apliqué la masilla con espátula.


(Así quedó cuando la masilla se secó)

2- Luego seguí con la pintura de la fachada. Tampoco quería que fuera perfecta, buscaba "manchas" de humedad, del tiempo, de verdina... Y me puse manos a la obra. Usé las pinturas acrílicas (Compradas en El Corte Inglés) que veis en la imagen, nunca había probado esa marca y he quedado encantada: se secan muy rápido, se disuelven en agua pero una vez secas son lavables, y tienen mucha variedad de colores por poco precio.

Me puse a mezclar blanco, negro y los tonos 227, 223 y 292 entre sí, y empecé a darle de base al plaste los tonos más oscuros, luego, cuando se iba secando, los más claros... Todo según me iba pareciendo, sin mucha técnica (Así soy yo! jaja).


Y así fue como quedó la pintura:


(Esta foto está hecha con flash, se modifican bastante los colores, pero se observa mejor los cambios de color o "brochazos" jaja)


Espero que os haya gustado, y recordad que si tenéis alguna duda, puedo intentar ayudaros desde mi "humilde experimento" :)

Ya he empezado con el tejado, pronto os lo enseñaré. Hasta entonces, espero que seáis muy, pero que muy felices.

¡Un fuerte abrazo!


----------------
Hello everyone!

I hope you all had a happy Christmas Eve and Christmas. Today I want to show the process of remodeling the house, which I have called "Bristol House".

1 - First of all , I wanted her appearance was not so perfect , I had roughness , imperfections in the wall. And for that I applied "plaste" . This filler is a powder , it is diluted in water as thick as the ye . No surface sanded or primer I applied , no nothing . Directly applied the putty knife .
2 - Then I continued painting the facade. Neither wanted it to be perfect looking "spots" of moisture, time, verdina ... And I got to work . I used acrylic paints ( Purchased at El Corte Ingles ) you see in the picture, had never tried this brand and have been delighted : they dry very fast , dissolve in water but once dry are washable , and have lots of variety of colors cheaply .

I started mixing white, black and shades 227, 223 and 292 together , and started to give basic plaste darker then tones when was drying , lighter ... I was looking all sorted without much art ( That's me ! Haha).

I hope you liked it , and remember that if you have any questions , I can try to help in my " humble experiment " :)

I've already started with the roof, I'll show you soon . Until then , I expect you to be very, very happy.

A big hug !

lunes, 5 de noviembre de 2012

¡Anda, la cartera! / Oh, my wallet!

Buenos días blogueros! 

Seguro que os suena el título de esta entrada (http://www.youtube.com/watch?v=GChYc42Sh1g). Y en relación a ello os enseño esta nueva miniatura. Yo no sólo pierdo la cartera, ¡también la cabeza! ¡De lo ricos que están!


Animaos a hacerlo, es muy fácil. Con el blíster de una pastilla o de una pila de botón y este imprimible que os dejo a continuación en 10 minutos tendreis el vuestro. Un fuerte abrazo!
-----------------------------------

Good morning bloggers!

In Spain, we heard lot of times the tittle of this post (http://www.youtube.com/watch?v=GChYc42Sh1g). And in relation to this I show the new sweet miniature that I have cone. I not only lost my wallet, also the head! Doughtnut are sooooo good!

Encourage one to do it, it's easy. With a pill blister or a stack this printable button and then I leave in 10 minutes you will have yours. A big hug!

domingo, 22 de enero de 2012

Papel / Paper

Hola amigos blogueros! 

En este post voy a hacer una recopilación del uso que le he dado a un papel que encontré por internet. Me encantó, lo vi muy versátil y he intentado sacarle todo el partido que he podido. Os lo pongo abajo también, por si os gusta, y queréis aprovecharlo en vuestras miniaturas. Ya me enseñareis los resultados. 

¡Pasad un feliz domingo!


-----------------
Hello friends bloggers!

In this post I will make a compilation of the use that I gave a paper I found online. I loved it, I saw very versatile and I tried to make the most I could. I put it down as well, if you like, and intend to use it in your thumbnails. You teach me the results.

Spend a happy Sunday!

martes, 3 de mayo de 2011

Tres pasos / Three steps

Buenas tardes blogueros.

A petición de muchas amigas y amigos voy a dedicar esta entrada a contaros como pinto los muebles, tanto los de madera como los de palacio. La verdad es que no lo he puesto antes porque la "técnica" o mejor dicho los pasos no son nada de otro mundo. Otra de las razones es que soy una humilde aficionada a las miniaturas, sin intención de ir de "sobrada" en nada, al revés, solo quiero aportar mi granito de arena a esta afición y si ayudo, aunque sea a una única persona, ya me doy por satisfecha. Me rijo por la filosofía de que en la vida "cada uno da lo que recibe": http://www.youtube.com/watch?v=QfhEKpFiepM

Bien pues, estos son los tres para pintar los muebles de nuestras casitas:

1. Pintar con pintura esmalte acrílico al agua de color blanco. (Yo la uso mate, aunque la satinada también queda muy bien)
- La superficie debe estar perfectamente limpia (En los casos de muebles pintados aplicaremos decapante y lijaremos, en los muebles sin barnizar lijaremos un poco y limpiaremos con un paño seco, en los muebles de palacio solo limpiaremos con paño).
- Daremos tantas capas como sea suficiente hasta que la superfecie quede perfectamente blanca. Dejando secar el tiempo más que sucificiente entre capas (muy importante que esté todo sequísimo)

2. Aplicaremos capa de barniz incoloro. En el caso de que queramos que se amarillee la pintura dándole aspecto de más envejecido, usaremos barnices más o menos claros. (Yo a veces los uso de color miel).
- Dejaremos secar todo el tiempo necesario para que se fije la pintura y quede perfectamente seca.

3. Con pintura dorada de tono oscuro procederemos a envejecer. Para aplicarla podremos usar un paño fino o bien un pincel. Yo siempre uso un pincel, lo empapo en pintura y luego lo seco muchísimo hasta que practicamente no "mancha" sino que hace "rayas" en el mueble. Y envejecemos por bordes, cantos, molduras... En fin, donde más nos va pareciendo.


GRACIAS por leer el rollazo que os he escrito hoy, jejeje,  y espero que a alguien le sirva mi humilde ayuda.

Un besito enooorme!


----------------------------------------------------------------------------------------------------------
Good afternoon bloggers.
At the request of many friends I dedicate this post to tell you how I paint the furniture, both wood and the palace. The truth is that I have not before because the "technical" or rather the steps are no big deal. Another reason is that I am a humble fond of miniatures, with no intention of going "over" anything, the opposite, I just want to contribute my bit to this hobby and if I help, even for a single person, I am satisfied. I adhere to the philosophy that in life "Everyone gives what he receives" http://www.youtube.com/watch?v=QfhEKpFiepMWell then, these are the three to paint the furniture of our houses:
1. Acrylic enamel paint with white water. (I use it mate, but the satin is also fine)- The surface must be perfectly clean (in the case of painted furniture and lijaremos apply stripper, furniture unvarnished lijaremos a bit and clean with a dry cloth, furniture of the palace just clean with cloth).- We will give as many layers as superfecie enough until it is perfectly white. Leaving more time to dry between coats sucificiente (very important that everything is very dry)2. Apply another coat of clear varnish. In case you want to paint yellowing giving more aged look, use more or less clear varnish. (I sometimes use honey color).- We'll dry all the time for fixing the paint is completely dry.3. With dark tone gold paint proceed to age. To apply it we can use a soft cloth or brush. I always use a brush, soak it in paint and then dry it very much until virtually no "stain" but makes "stripes" in the cabinet. And age by borders, edges, molding ... Finally, where more is going looking.Thanks for reading . A big kiss!
Related Posts Plugin for WordPress, Blogger...